Yokomo BD9 vs Xray T4’19 Double Build
After reading a lot of BD9T4 copy comments all over the internet ever since the new Yokomo BD9 was released, and also noting the similarities myself, I one day came up with the idea that I want to do a side-by-side double build of these two cars to see how similar they really are.
A few provocative teasers on the Blog Kentech Facebook page certainly got a lot of attention, so there seems to be other people interested in this as well! 🙂
Now, actually doing this build, with all the pictures and notes, has taken quite a bit of time and effort. Much more than I thought, but I’m done now though, so I hope you find this comparison interesting.
I’ll try to keep this post quite short on text, as there are a lot of images. I’ll also keep the comments on copy this, copy that, to a minimum, and let you, the reader, interpret yourself. This was always the intention, despite my few provocative Facebook preview posts to spark interest… 🙂
…
Yokomo definitely wins the more beautiful box award though!

Chassis comparison time. Both kits are the carbon versions.
T4’19: 2.2mm thick, 86mm wide, 64g
BD9: 2.3mm thick, 85mm wide, 68g
The Xray chassis is slightly softer.

Chassis outline and main cutouts. You could say they are similar, but then so are most TC chassis’ these days.

Lower bulkhead comparison. Both manufacturers now use beautifully chamfered outer edges on the bulkheads.
T4’19: 5.3g each, 15mm spacing between front and rear chassis mounting holes.
BD9: 5.2g each, 17mm spacing between front and rear chassis mounting holes.

19mm between the left and right bulkheads on the T4’19.

A new feature included with the ’19 model Xray is this optional alu front chassis stiffener. Not sure how much this is, or will be, used.

BD9 bulkhead spacing is 18mm, which can be considered very narrow, and a clear difference to the T4, although both are at the narrow end.

T4’19 and BD9 motor mounts beside each other.
A longer center mount plate that extends rearwards is also available from Yokomo as an option part for the BD9.

The distance between the left and right motor mount / layshaft mount holes in the chassis is 19mm on the Xray.

On the Yokomo this is also 19mm.

How the motor mount area looks from the underside on the T4. As you can see there are lots of mounting point options for flex adjustments.

And on the BD9 it looks like this. Un-used rearward holes for the optional longer mount plate. You can also see how both sides connect to the centre plate with ball-head screws.

Yokomo includes this carbon roll plate for flex options. The front left end is fastened together with a small alu fan mount, while the right side use the rear battery holder for support, which you will see later in the build.

With the BD9, Yokomo have gone with a one-piece spool solid axle and pulley, just like Xray. Obviously both are 38T…
Yokomo include steel outdrives which you can use with blades on the driveshafts, while Xray include the rather cheap plastic versions that racers usually don’t use.
T4’19 solid axle housing: 5.2g
BD9 solid axle housing: 5.5g
T4’19 plastic outdrives: 2.0g each
BD9 steel outdrives: 4.4g each
T4’19 spool overall weight including screws: 13.9g
BD9 spool overall weight including screws: 19.3g
Please note that it is not a fair comparison because of the outdrives. Should be compared with optional alu outdrives for both spools, which both manufacturers offer.

Assembled spool comparison, obviously 10x15mm bearings used by both.

Comparison of the rear gear diffs of the cars. Here it is obvious that Yokomo tried to imitate the Xray diff.
T4’19 38T diff case both halves: 6.3g
BD9 38T diff case both halves: 7.2g
T4’19 inside gears: 18T/10T
BD9 inside gears: 18T/10T
T4’19 outdrives: 3.2g
BD9 outdrives: 6.8g
T4’19 complete diff weight without oil, screws, seals: 13.7g
BD9 complete diff weight without oil, screws, seals: 18.2g
T4’19 complete diff weight fully assembled with oil (no bearings): 16.2g
BD9 complete diff weight fully assembled with oil (no bearings): 20.4g

The T4 diff is as most people know excellent. It has been in use for a long time and is perfectly refined for a plastic diff. Goes together without issues and is very smooth. No need to sand anything.
The BD9 diff is very much ‘inspired’ by the Xray diff, and feels quite OK when built. It is not as refined and smooth yet though.

Next up the layshaft axle comparison. This one I actually posted about on Facebook, as I literally got lost when I made the mistake of opening both bags at the same time and mixed them up. It was really hard to see any difference, until I noticed the BD9 version has threads inside the hollow axle.
But this part is really taking the price! Sorry Yokomo, where is your pride?
T4’19 layshaft: 3.2g
BD9 layshaft: 3.2g

Xray include a 48P 84T spur gear, while Yokomo includes an Axon 64P 110T spur.
Xray’s pullies are plastic, Yokomo’s are beautiful aluminium. Both 20T. The assembly otherwise is totally the same.
T4’19 pulley weight: 2.6g
BD9 pulley weight: 4.9g
T4’19 layshaft assembly complete: 11.1g
BD9 layshaft assembly complete: 13.6g

Drivetrain installed on the Xray. Belts are 513mm or 171T front, and 189mm or 63T rear.

Drivetrain installed on the Yokomo. Belts are 513mm or 171T front, and 189mm or 63T rear. (Yes, I could copy paste that piece of text!) 😀

T4 bearing hubs or eccentrics with high/low option as per industry standard.

Yokomo have the same belt tightness adjustment as well as diff height adjustment, but still use their own system with a spring and ball instead of notches in the bulkheads to lock the cams into place.

Xray layshaft bearings are 5x9x3mm on the T4’19.

Yokomo layshaft bearings are 5x10x4mm.

Yokomo includes this rear belt tensioner with two 4x7mm bearings.

Upper bulkhead comparison time next.
T4’19 upper bulkheads: 2.9g each
BD9 upper bulkheads: 3.7g each


Both cars side by side with drivetrain and upper bulkheads installed.

Damper towers compared.
Although they look very similar, all holes are slightly differently placed, so in this case they are more different than they look. Both are 3mm thick carbon fibre though.

And on the cars…


The centre pitch stifferner mounts to the centre motor mount plate at the rear, and to the servo mount at the front on the T4. The stiffener plate is 2mm thick.

On the BD9 the stiffener plate mouts similarly at the rear, but to a separate alu plate at the front.

A simple countersunk screw with washers in the servo mount, together with a small carbon plate in the right side layshaft mount, is used to keep the battery away from the belt on the T4.

On the Yokomo alu posts with screws and washers are used, mounted to the front and rear centre plates.

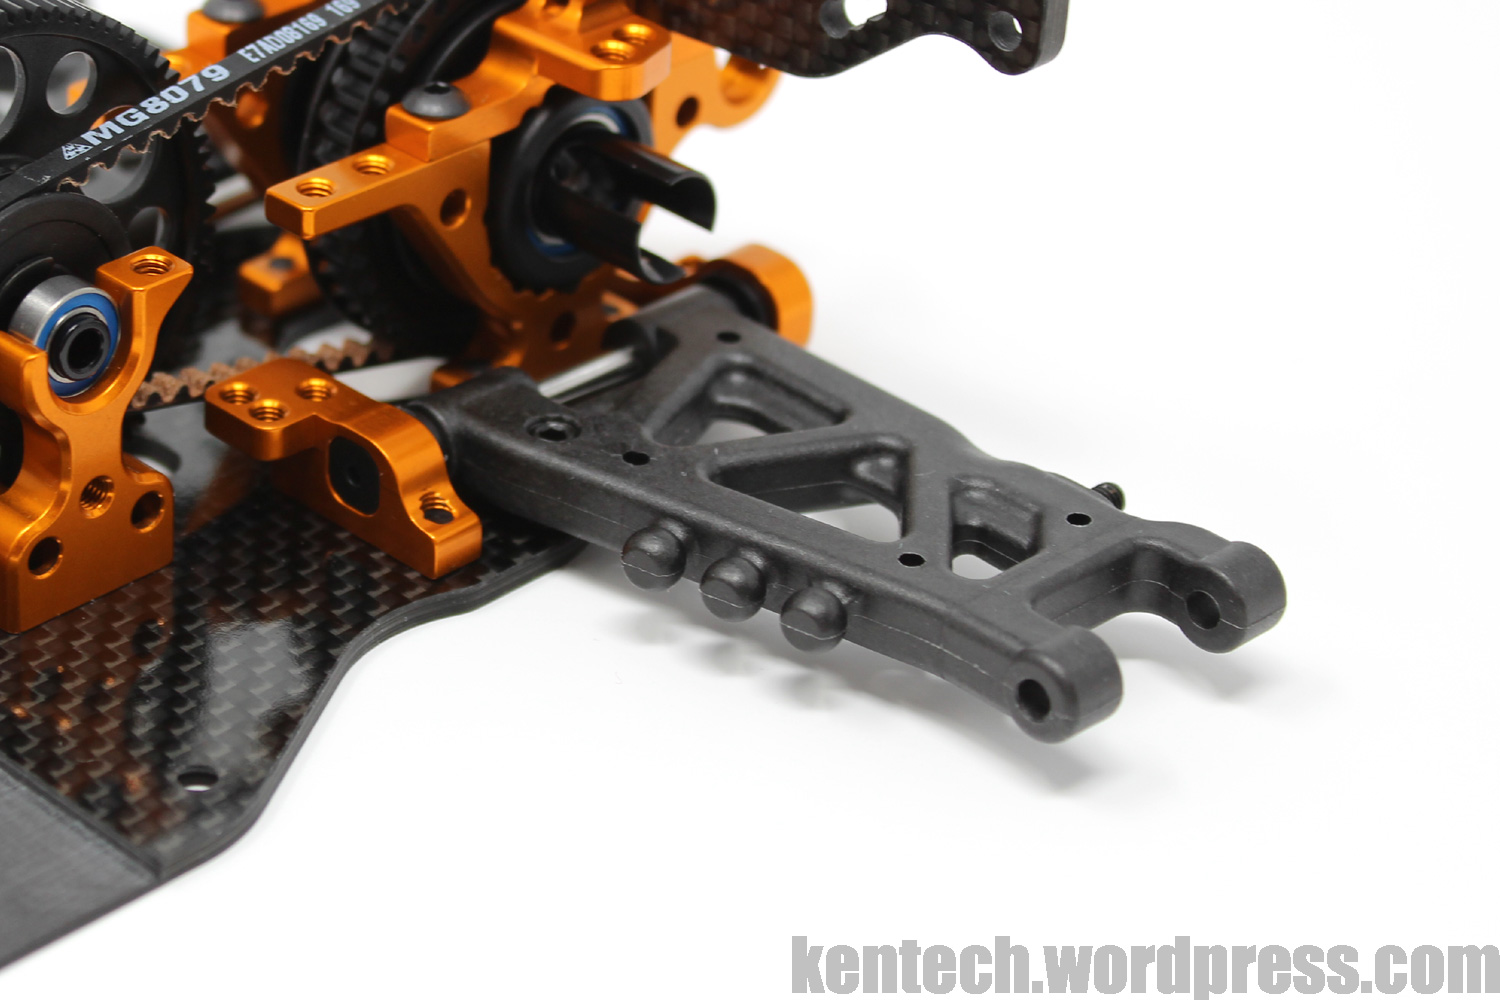
Suspension arm comparison.
Yokomo use a for them completely new material mix for the new suspension parts. As you can see, the overall look is very similar between the arms from both cars, but there are subtle differences when you measure them that make the geometry of the cars different.
T4’19 front arm: 7.3g
BD9 front arm: 8.0g
T4’19 front arm pin-to-pin length: 52.65mm
BD9 front arm pin-to-pin length: 53mm
T4’19 front arm inner pin to damper hole length: 31mm
BD9 front arm inner pin to damper hole length: 31mm

T4’19 rear arm: 8.0g
BD9 rear arm: 9.1g
T4’19 rear arm pin-to-pin length: 54.45mm
BD9 rear arm pin-to-pin length: 55mm
T4’19 rear arm inner pin to damper hole length: 39.75mm
BD9 rear arm inner pin to damper hole length: 40mm
The arm lengths are all measured at my best ability, which might not be great! 🙂

All suspension mounts from both cars in the same photo.
Both cars use plastic inserts in these to change pin width and toe angles etc.

Front arms mounted and side by side. Both cars now use “solid” pins on which the arms pivot, i.e. there are no balls that go into the inserts.
You really need to be quite firm when you push the Yokomo inserts ito the mounts, to make sure they are really seated.

Fitment is really good on both cars here. No problems with sticking arms or excessive play. Arms fall under their own weight on both cars without fiddling. Anyway, a 3mm arm reamer is good to have when you have a car with this arm/pin system though.

More views of the arms mounted. One-piece mount behind the front arms on both cars.


Separate mounts in front of the rear arms on both cars.

Rear side view.

One unique feature of the BD9 design is that they really tried to shorten the rear overhang with the way the arms are formed and mounted.
This is something I personally have waited for manufacturers to start working on. Now I hope someone does the same with the front overhang, as that means you can run your car lower. Making it possible to lower your whole car is much more effective in lowering CoG than any ultra short damper…

The T4’19 includes a 1.4mm front roll-bar, and a 1.3mm rear bar.
The BD9 includes a 1.3mm front roll-bar, and a 1.2mm rear bar.

Roll bars mounted on both cars.
The T4 bars use 4x7mm ball bearings, while the BD9 use 3x6mm bearings. The Yokomo solution is definitely my favourite as it looks much cleaner with smaller bearing holders.
The roll-bars are smooth and easy to setup on both cars.


Both cars include front double-joint driveshafts. Again a situation where it would almost be difficult to tell them apart if it wasn’t for the printing on them.
Exactly the same in construction, the Yokomo version comes pre-built, but you are adviced to take them apart and use grease etc.
T4’19 double-joint driveshaft: 8.3g
BD9 double-joint driveshaft: 8.2g

The rear driveshafts are at least a bit different.
T4’19 rear driveshaft: 5.2g
BD9 rear driveshaft: 6.5g

The steering blocks are again fairly similar.
T4’19 steering block: 3.1g
BD9 steering block: 3.1g
Both steering blocks are 20.5mm high, and since they are symmetrical, you can calculate the axle position yourself! 😀
Kingpin hole to steering link hole distance appears to be the same @ 28.5mm.

T4’19 C-hub: 3.2g
BD9 C-hub: 3.5g

T4’19 rear hub: 2.7g
BD9 rear hub: 2.6g
Pin to axle distance is 0.5mm less on the Yokomo rear upright.

Front and rear upright assemblies of both cars, side by side.
T4’19 complete assembly front: 20.8g (as pictured below)
BD9 complete assembly front: 21.2g (as pictured below)
T4’19 complete assembly rear: 12.1g (as pictured below)
BD9 complete assembly rear: 13.3g (as pictured below)

Another time when I almost got lost… Outer suspension pins.

Uprights on the cars.


And a closer look…


Steering assembly comparison.
The steering posts are further from each other on the Xray, and as you can see there are also other differences.
Considering the price of the kit, it’s dissappointing that Xray still insists on including the plastic steering arms. Alu sleeves between the lower and upper bearings are a new feature on the T4’19 model.
Yokomo’s steering is fully aluminium.
Both use 5x8mm bearings.

Steering in the cars.


T4’19 floating servo mount is 3-piece alu/carbon fibre, with the option of mounting the steering arms/posts to the chassis or to the servo mount. Posts for both options are included.

The BD9 comes with this aluminium one-piece floating servo mount.

The T4 servo mount is attached to the chassis via three screws and two pins.

While the BD9 mount use only three screws, and is mounted quite a bit further forward on the chassis.

Upper deck comparison, both 2.0mm carbon fibre, and VERY similar you have to agree.

Top deck’s on n the cars, both attached with two screws per bulkhead, i.e. 8 screws in total, with the option on both cars of a further two screws in the layshaft mounts.


Main damper parts side by side.
Both cars use what you could call ultra short dampers. Xray already used these on the T4’18, but Yokomo’s version is new and made by Axon.
These new dampers are of very good quality with all parts making up the damper nicely finished. They are also even more extreme than Xray’s in shorthness.
Somehow to me it feels that manufacturers are maybe pushing this a bit too far making it very critical, but I will reserve judgement until I have tested them on track.
Xray’s dampers are well proven in that they go together and work well. I’m no fan of the moulded pistons and shaft guides though.
T4’19 damper cylinders: 11.2mm inner diameter, 12.4mm deep, 1.3g
BD9 damper cylinders: 11.4mm inner diameter, 12.6mm deep, 1.1g
The Yokomo damper have thinner walls.
T4’19 damper shafts: 23.0mm
BD9 damper shafts: 19.1mm
Xray includes 450 weight oil, Yokomo 350 weight oil.
T4’19 springs: 2.5 front and rear
BD9 springs: 2.45-2.75 front, 2.60 rear

Dampers on the cars; three upper damper mounting holes front and rear on both cars with the middle one used front and rear on both cars out of the box.


Front bumpers are quite different.

New on the T4’19 are body posts that can be adjusted front to back, to allow moving the body front or rear without changing body.
Two different front body post pairs are included, and well as spacers for the rear body posts, giving yo three options (3mm between steps).

The BD9 front lower bumper is similar to that first seen on the Mugen MTC1, with perhaps some aero-effect sought through its design in addition to making it very light.

T4 front bumper assembled with foam bumper, body posts and upper holder, all fitted to the car. Weight of complete bumper assembly with uncut body posts: 23.3g.

And Yokomo’s complete front bumper assembly. Weight of complete bumper assembly with uncut body posts: 18.7g. This feels very light, in what is a great place to save weight on.

Xray’s rear body posts. You can see one spacer used between tower and body post, for middle setting.

Yokomo’s rear posts.

Simple plastic battery holders together with battery tape is used to hold the battery on the T4’19. More fancy adjustable carbon fibre and alu holders are available as an option.

Included with the BD9 is this new tape-less battery holder system. This is adjustable in height, and will allow some movement to prevent tweak issues. A better looking carbon fibre version is available as an option part.
Also seen here is the included front belt tensioner on the upper deck, using two 3x7mm bearings.


Finished Xray T4’19 kit! Weight like this (+ wheel nuts): 471g.

Finished Yokomo BD9 kit! Weight like this: 513g.


Top view of both cars.


Additionally included with the T4’19 is the ARS system rear suspension. Hardware for the ARS obviously also included, but not in the picture.

Yokomo on the other hand includes this “First Aid” parts kit, at least with the first batch of BD9’s. I don’t know if this will be included with later cars, but a welcome addition nontheless.

Xray includes a small bag with a few bits of spare hardware.
There are also some leftovers of some hardware when the BD9 is built.

With the BD9 Yokomo includes aluminium screws in addition to steel screws for three uses; Lower bulkhead, upper bulkhead and upper deck. These can then be used as you wish, with the manual suggesting to use them to fine tune flex.
The screws have a beautiful mirror-like chrome finish.

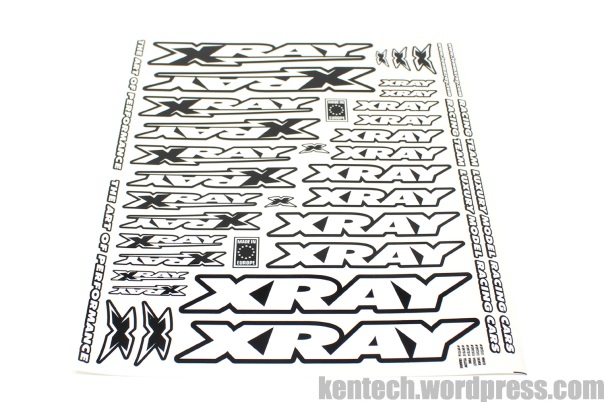
Standard Xray stickers included with the T4’19.
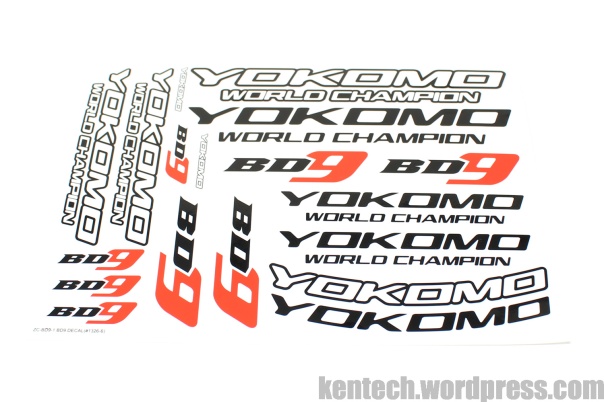
BD9 sheet included by Yokomo.
That’s it then! Both cars built and compared, with lots of images for you to study!
Both cars built well with no problems. The Xray feels very refined in every way now, and it is obvious when building it that this is a platform that has been fine-tuned over a long time already. It’s a proven car on track, with good quality and support, and hence fully understandable why it is popular. The only minus in my book is that I think they should include a few more option parts for the price they charge.
It’s been 15 years since I last built a Yokomo, but they had good quality then and still do now. The BD9 is not yet quite as refined as the Xray though, but that is no surprise when it is a 90% new car for Yokomo.
I will stick to my promise on not writing many personal copy or not comments, and let you interpret what you see as you wish. I did my best to present both cars, both similarities and differences. It is fairly obvious that the BD9 was heavily inspired by the T4 , but if you read carefully you will have noted that there are also quite a number of differences.
Hope you enjoyed this. It certainly took a bit of effort this time!
…
(Let me know if you find some errors. Already aware of the front right upper ballcup on the BD9 which is installed the wrong way, but all the pictures were taken when this was noticed…) 🙂
Posted on December 6, 2018, in Uncategorized. Bookmark the permalink. 12 Comments.

La yokomo. A raffinato e smussato gli spigoli di un progetto xray più spartano ma vincente
Gli spunti sono chiaramente presi dalla xray con piccole modifiche riportate dalla yokomo
Hi Kentech. Thanks for the detailed writeup! I am astonished, that the XRay drivetrain is almost 30%lighter, than the Yokomo. I always find your detailed weighing very interesting, as this sometimes could explain things. Great you also noticed the rear Yokomo arms. I just tried to fit them on my Tamiya, just to realise that the outer hinge pins are larger in diameter on the Yokomo…
Thank you!
The Xray drivetrain is very light yes. Obviously the big difference on the spool weight is not the reality of what is used by racers…but there is still a significant difference elsewhere as well.
AWESOME article Kenneth! Truly useful for those choosing between the two brands, and technical too. Great job, my friend. A massive thank you! Cheers.
Thank you! 🙂
Great article never seen before!!
I’m looking for driving comparison, if you can 🙂
Thanks a lot! Will have to see about testing on track. Not sure, but I will do it if I have time.
Are their front spool interchangeable?
Not sure, and I don’t have the cars anymore so I can’t check.
Pingback: Yokomo BD9 Update | BLOG KENTECH
Pingback: Tamiya TRF420 Presentation | BLOG KENTECH
Pingback: Further Details on the Mugen MTC2 | BLOG KENTECH